Monday, December 20, 2010

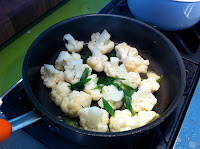
Cauliflower & Green Onion

Cauliflower & Green Onion


Ingredients:
1             Head of Cauliflower
2            Stalks of Green Onion
Salt & Pepper
  1. Cut the head of cauliflower into similar size florets
  2. Slice the green onion and add to a hot wok or sauté pan over medium high heat with about a tablespoon of vegetable cooking oil.
  3. Add the cauliflower florets, salt and pepper to taste, then add about ¼ cup to ½ cup of water and cover for a few minutes.
  4. Check for doneness by piercing the cauliflower with a chopstick or fork, which should go through the cauliflower easily without any resistance.
  5. Remove from heat and serve.

Stir-Fry Bok Choy & Mushrooms

Stir Fry Bok Choy & Mushrooms

Ingredients:
A Few Bunches of Bok Choy
A Few Ounces of Mushroom (I used King Oyster here, but you can use almost any other meaty mushroom like Shitake or Portebello sliced)
2-3            Cloves of Garlic
Salt & Pepper

  • When stir-frying any veggie dish, you generally want to slice or chop your ingredients into similar shapes and sizes so that it’s visually pleasing and cooks evenly.
  1. Wash all the veggies and slice the bok choy and mushrooms into 1-inch pieces.
  2. Add a tablespoon of cooking vegetable oil to a hot wok or large sauté pan over medium high heat.
  3. Mince the garlic and add to the pan, once you see the garlic sizzle and smell the garlic aroma add the mushrooms and let the mushrooms cook until slightly brown, a few minutes.
  4. Add the bok choy, salt and pepper to taste, toss with the mushrooms and sauté for a couple minutes until leaves wilt.  Remove from heat and serve.

  • Remember to keep cooking time in mind, whatever will need more time to cook should be added to the pan first.
  • You can also use any other green veggie, such as broccoli, chayote, or spinach.  The mushrooms are sort of like a yummy meat substitute. =)  Below is spinach with beech mushrooms and also a little sliced red chili for an additonal spice.

Sunday, December 19, 2010

Chunky Salsa

Chunky Salsa


Ingredients:
2            Tomatoes
½           Bunch Cilantro
1            Sweet Onion
1            Jalapeno (2 if you want it spicier)
2            Cloves of Garlic
½           Lime Juiced
Salt & Pepper

  1. Dice tomatoes, sweet onion, jalapeno, chop cilantro, and mince garlic.
  2. Mix all the ingredients in a bowl, add the lime juice and salt and pepper to taste.

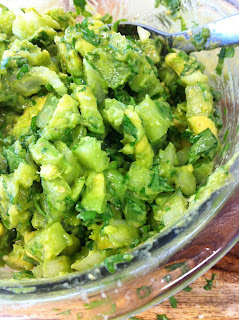
Green Guacamole

Green Guacamole

Ingredients:
2            Avocados
1            Bunch Cilantro
2            Tomatillos
½            Sweet Onion
2            Cloves Garlic
1            Lime Juiced
½             Teaspoon Cumin
Salt & Pepper

  1. Half the avocados and carefully remove the seeds.  Score the flesh of the avocados by cutting vertical and then horizontal lines without cutting through the skin then scoop out into a bowl with a spoon.
  2. Dice the tomatillos and sweet onion then add to the bowl.
  3. Chop the cilantro and add to the bowl.
  4. Mince the garlic then add to the bowl along with the lime juice, cumin, and salt and pepper to taste.
  5. Mix everything together and serve
            *To keep avocados from browning, keep one of the avocado seeds in the guacamole.

Vegan Love

Vegan Love

Nope, your eyes do not deceive you, I wrote “love” with “vegan”.  Those who know me know my love of food, almost all food.  I appreciate how so many things from this beautiful and bountiful Earth have been ingeniously used to give us life and sustenance.  It is a testament to human adversity, history, tenacity, and innovation.  Many mistake my love of food, including animal and animal by-products, as a shunning of those who choose to live a vegan or vegetarian life-style.  This cannot be further from the truth.  I admire and respect any who make careful, educated, and well thought out choices for themselves and choose to stand by a principle.  The thing that I detest, are not those who choose to be vegetarian or vegan for a love of your own health or animals, but those who choose to be wasteful, hypocritical, and devalue an animal’s life by wearing a leather belt while speaking of animal rights.  What I consider a further indignity is the person who chooses to act and think out of cultural ignorance, and demeans other people’s way of life by rudely assuming another culture’s food is gross just because it is foreign to them.  Before I veer off into a whole other vent, I’m reminded that I entitled this post, “Vegan Love”.  So instead of the venting, let me refocus on the love. =)

Granted most of time I consider my diet pretty healthy.  80% of the times I cook at home, bring home-cooked food to work for lunch, and its usually healthy well-balanced Chinese food.  Some protein, lots of veggies, and brown rice are common factors. But I do like a good cleansing a couple times a year.  I’m not a physician or scientist or even a nutritionist, I’ve read a few articles and that’s about it, so this is not by any means expert advice, just what I’ve experienced and done in my life to stay healthy.  I feel that our bodies, like other machinery in our lives like our cars or plumbing, must collect some undesirable substances through our daily intake of stuff, good and bad, and that extra gunk in our system can’t be good for us.  So every few months or so, I like to clean it out.  Unclog my organic biological pipes, and the best cleaning method that I’ve done is a strict vegan diet for about 10 days.

The rules are simple: only eat vegetables and drink water.  That’s it.  This cleanse was first inspired by a spiritual fast based on the story of Daniel in the Old Testament.  The first time I did it, it was spiritual based so I was on the diet for 40 days.  Since then, I’ve done it more for a physical cleanse as well as spiritual fast.  The first questions people have are always about what kind of food might be allowed or drinks, like “how bout coffee? can you have soda? bread? milk? pastries?”  I used to answer each question but now I just repeat the simple diet: ONLY eat vegetable and drink water.  If you question it, then don’t eat it.  Of course there are a few grey areas, like avocados and tomatoes.  Are they fruit or vegetables?  I don’t know, but I eat them. 

I also found that Asian cooking is very vegan friendly!  There’s only so much salad someone can eat and raw veggies aren’t my favorite, so I allow myself olive oil, salt and pepper.  The possibilities are quite expansive and I’m challenged to cook and eat veggies I don’t normally try.  The creativity in my cooking improves leaps and bounds and I feel healthier, cleaner, and thinner by the end of the 10 days.  That’s a good thing.

I have asked myself, why not make this a permanent life choice?  All that I have listed are positive outcomes.  My answer is simply that I love food…all food.  It might not be the best for my health, but I WANT to eat animals and their by-products.  I love cheese, bone marrow on toast, chicken broth, sweet seafood, and a tender piece of red meat.  So I opt for a semi-annual cleansing to allow for guilt free consumption the rest of my days, I figure it balances out somehow =) 

Now for some vegan recipes that help me keep my vegan days delicious…see following posts...


Friday, November 12, 2010

Pumpkin Panang Curry Pot Pie

Pumpkin Panang Curry Pot Pie


I love flaky buttery breads, like the top of a pot pie.  Pot pies are really the quintessential comfort food.  Its warm and creamy paired perfectly with the crust, mmmmm….and it’s so hearty!  But oftentimes I find the white cream sauce typically used in pot pies to be too rich and lacking in kick, the kinda punch and kick you get from spice.  So I came up with a curry pot pie that has more than enough flavorful sweat inducing spices along with all the sweet, savory, and sour notes that hit every part of my palette, while also having the creamy and crusty textural qualities of a pot pie.

Cook Time: 45 Minutes            Yields: 4 – 6 Servings


Ingredients:


o      Squash or Pumpkin, Chopped into bite size pieces
o      2 Tablespoons Panang Curry Paste*
o      1 Medium Can (about 14oz) Coconut Milk*
o      2 Shallots or 1 Brown Onion, Chopped
o      4 Sweet Peppers or 1 Red & 1 Green Bell Peppers, Chopped
o      A Handful of Mushrooms (Button or Baby Bella), Quartered - Optional
o      2 Stalks Green Onions, Chopped
o      3 Slices Fresh Ginger
o      1 Lime and Lime Leaf
o      Protein of your choice, shown here chicken thigh meat, cubed
o      Store Bought Frozen Puff Pastry Sheet
o      Cooking Oil
o      Michiu (cooking rice wine)*
o      Salt & Pepper

* Available in most Asian grocery stores or in the ethnic/Asian aisle at a local supermarket


  • Preheat oven to 375 degrees.
  • Marinate cubed protein with salt, pepper, and a tablespoon of Michiu.
  • Bring a pot of water to boil and cook the squash or pumpkin for about 5 minutes.  Use a chopstick or toothpick to stick through a piece, if it goes through then it's done.
  • Heat 1 tablespoon of cooking oil in a pan and cook the protein of your choice. Chicken or pork: brown over medium high heat. Shrimp: sauté until slightly pink over medium heat. Beef: sear over high heat.  Remove from pan and set aside.
  • Heat 1 tablespoon of cooking oil in an oven safe saucepot and sauté the onion, ginger, and peppers until fragrant (a few min).  Add the mushrooms and sauté until slightly brown.  Then push everything to the edge of the pot making space in the middle, add a little bit more oil if necessary and add the curry paste with a few tablespoons of the coconut milk and mix while heating through.  Add the rest of the coconut milk and lime leaf, mix everything in the pan together and bring to a simmer, reduce to low heat.  Salt and pepper to taste


  • Take the puff pastry out of the freezer and let it defrost for about 10-15 min while the curry simmers.  Meanwhile prepare a egg wash by beating an egg in a bowl.
  • Add the protein and squash/pumpkin to the curry mixture, turn off the heat and quickly place the puff pastry sheet over the top of the pot like a lid and brush quickly with egg wash then place in oven for about 10 – 15 minutes or when the puff pastry puffs up and browns.  Remove from oven and serve with rice if desired.  When you break through the crust, squeeze some lime in the curry to add a hint of sour and brighten up the dish.


Tip: You can also serve as individual portions by pouring the curry into individual ramekins or oven safe bowls and cutting the puff pastry into circles that fit over each ramekin. Then continue with egg wash and put in oven.

Thursday, November 4, 2010

Very simple, very delicious! – Pot roasted, buttery, garlicy and peppery crab

Yes. I love crab. I grew up on an island with abundant seafood, and I learned how to steam a crab at age 10. It’s not hard at all and it tastes much better than the boiled and chilled ones they sell at touristy restaurants. Buy a live crab and follow this recipe, I bet you’ll love it!
Ingredients: 1 live Dungeness (the bigger the better), 3 slices of ginger, 1 stalk of green onion, ½ tablespoon of butter, 1 teaspoon of salt, 1 teaspoon of garlic powder, ½ teaspoon of white pepper powder, 1 cup of ice cream salt
Methods: Use an old tooth brush to clean the crab. (grab the crab from the bottom to avoid claw attack! You can use a tong too.) Boil 2 cups of water in a big pot. Place green onion and ginger slices on your steam basket and put the crab in, stomach facing up. Put the steam basket in the boiling pot and steam for 10 minutes over high heat. Remove the crab from steam basket and place it on a plate. Cut butter from a cold stick and use a fork to cover the crab evenly. Mix salt, garlic powder and white pepper powder and sprinkle evenly on the crab. Put ice cream salt in the big pot (that fits the crab) and stir till very hot, about 2 minutes. Place the crab on top of the heated salt and put the lid on, do not add water at this step. Pot roast for another 10 minutes over low to medium heat.
Once you try it this way you’ll never want to go back to the “boiled and chilled” version. The shell is covered with yummy seasoning and the meat is intensely sweet by roasting on ice cream salt. You’ll get the butter + crab flavor combo without dipping the lean crab meat in artery clogging butter. More flavor, less guilt!
P.S. If you prefer steamed crab, just follow half of the recipe.

Here's a little "How to eat crab" tutorial =)

Monday, November 1, 2010

Garlic Broccoli and Chicken

Broccoli and Chicken

When my mom was teaching me how to cook, she used to simply say that basic Chinese cooking merely involves pairing meat with a veggie and sauté with garlic.  This is a perfect example of that philosophy.  It’s easy, simple, healthy and packed with garlicy flavor. 

Cook Time: 15 min                        Yields: 2-3 Servings

o      1 Head of Broccoli
o      6-8 Oz of Chicken thigh meat (w/o skin and bones)*
o      2 Cloves of Garlic finely chopped
o      Cooking Michiu (Rice Wine)
o      Salt and White Pepper powder


1. Trim the head of broccoli by cutting off each floret and peel the skin off using a paring knife.  Soak all the broccoli florets in water.

2. Cut the chicken into bite size pieces and season with a splash of Michiu, salt and white pepper powder (about a teaspoon each).


3. Heat cooking oil in a large sauté pan that has a cover.  Add the garlic and chicken to the pan and sauté over medium-high heat, browning slightly.


4. Drain the broccoli florets and add to sauté pan, toss with the chicken and salt and pepper to taste.  Add about ¼ - ½ cup of water and cover to steam for about 3 minutes.


5. Taste test one of the florets to makes sure that its cooked through but still firm.  If it needs to cook a little more, continue to sauté for a couple more minutes.  Serve with some rice or as a side dish.

    You can substitute the chicken with any other meat or seafood, such as beef or shrimp, or just cook the broccoli alone for vegetarian dish.  =)

    Thursday, October 28, 2010

    Frugal & Sustainable


    Frugal & Sustainable

    One of the core mantras for the current sustainable or “green” living trend is to minimize waste.  Take shorter showers, start a compost bin, turn off appliances and lights when not in use, wrap yourself with a blanket instead of turning on the heater, recycle and reuse bottles and bags, etc.  These are all great tips and I’m not minimizing their value, but I want to shed a glaring light to the fact that these are far from new ideas.  Though not always fueled by a great conscious effort to preserve the Earth’s resources, people’s motivations for being sustainable were much more about personal survival and forced circumstantial frugality, the resulting actions were the same.  I find the green movement to be a good one, but also a puzzling one and an interesting display of American industrialized wealth. 

    I believe it is human nature to minimize waste and value resources by making products last as long as possible, to use every last animal part to extract as much nutrition and value from it as one can, because these resources are precious and in today’s industrialized society, cost money.  You see it throughout different societies and cultures in the world and through history.  Most deities, who were worshipped, are fashioned after natural life-giving resources or thought to have powers to control the Earth’s precious resources that recognizable give LIFE.  People give thanks to gods for water and crops or show their gratitude through prayer before killing an animal.  These customs reveal how the basic human needs of shelter, water, and food were always valued and thus never wasted.  It isn’t until recently and specifically in countries, such as America, where most of the vast population has these basic human survival needs met, that waste has become such a big environmental issue.  Thanks to our global industrialized society and economy, people no longer have to hunt for their meat or grow their own crops.  Convenience has become a modern day god.  Everything you need at the touch of button or bought at the neighborhood market and the supply seems to be endless.  Nowadays the ones who are most green in their living practices have become the poorer and less affluent ones in the world because in their minds, water, electricity, food, and products are still precious, hard to come by because of monetary cost.  To be frugal is to be sustainable.

    Coming from modest backgrounds, my family was technically already green.  When my parents first moved to this country 35 years ago, it boggled their minds that many Americans had habits such as keeping the heater/air-conditioner on in their homes almost at all times.  It was discombobulating that the only chicken parts they could find in the supermarkets were boneless, skinless, breasts and thighs.  Where had all the other parts of the chicken gone?  And the steaks!  How could anyone consume a whole 8oz slab of meat at once?  Once again, what happened to the rest of the cow?  Where are all the bones?  Water is so valuable, how is it possible for janitors to clean driveways and buildings by hosing it all down?  We weren’t intentionally being green, we were just cheap and made the most out of every bit we had.  Especially when it came to food. 

    The previous posting of a recipe for Chicken Noodle Soup, where homemade chicken stock was used, is what prompted this rant.  Now let me go back to the subject of homemade stock, everyone should do it!  Not only will it add so much more flavor to your cooking, it’s easy, it will save you money, and it’s being green.  BONES = FLAVOR!  First off, don’t be scared of where your food comes from, meaning that chicken breasts come from a chicken.  Therefore, don’t be scared of the other parts of the chicken.  There is nothing wrong with bones and organs and dark meat.  It’s healthier for you than a chicken nugget and its tastier too.  By the way, chicken nuggets are made of all the skin, bones and undesirable parts anyways.  They just add a whole bunch of chemicals and flavoring then form it into a nugget and deep-fry it, does that still sound healthy to you?  Chicken patties at fast food restaurants are made the same way.  Meat comes from an animal; if you are willing to eat meat then you must accept this fact.  To actually respect the animal that you are eating is to appreciate every part of it and not just throw out most of its body as trash.  An easy way to use the bones of any animal is to make stock.  One of the reasons why good restaurants’ food tastes so darn good is that they use homemade stock.  Throw some chicken bones, veggies (the classic combo is onion, carrots, and celery, but I also like to add ginger), and dash of salt in a pot, add water, bring to a boil and just let it simmer.  Watch a few TV shows, check on the pot and add a little more water in between shows, and voila!  You have successfully made stock.  Let it cool, strain out the bones and veggies, all the flavor is extracted out of those suckers so now you can throw it away.  Pour into usable portions in freezer friendly Tupperware and toss in the freezer, ready to use when you need.   You can do the same with pork, beef, vegetables, and seafood.  Go to an ethnic market and buy a whole fish, its much cheaper than just buying the packages fillets.  The market will gut it and clean it out for you.  Also buy shrimp whole as well, with their heads still attached and everything.  Take it home and remove the heads and shells of the shrimp, chop off the head of the fish, and throw it all into a pot with some ginger, onion, and carrots.  Do the same and you have a wonderful seafood stock that you can use to make shrimp bisque, seafood gumbo, and so many other seafood stews. 

    Maybe instead of trying to reinstate a collective conscious to save the Earth, the green movement should also reiterate and how going green can save the common citizen tons of money.  Emphasize that these resources are not just valuable to a third person named “Earth”, they are valuable to us.  To our pocketbooks and add so much nutrition and flavor to our lives.  To the cooks out there, we should challenge ourselves to come up with creative ways to use what we have to its fullest and extract as much flavor out of whatever ingredients bestowed upon us.  This is what many people in different cultures around the world has had to do for survival and some of the tastiest signature dishes were born this way.  We were fortunate enough to be born into a time and place of plentitude thus we now live in a culture of taste and unappreciated resources.  I choose to counter this wasteful culture and I challenge others to do so as well.  Revive the motto “waste not, want not”, into our collective mindset!  


    Wednesday, October 27, 2010

    Rosemary Lamb Chops


    Roasted Rosemary Lamb Chops


    Rosemary is so earthy and woody, it’s like the scent of the forest, and so it pairs really well with a gamey red meat like lamb.  I love the flavor of lamb, and this simple way of roasting a rack of lamb is an easy way to get my lamb fix.  Lamb isn’t typical meat that you see a lot of in most American neighborhood grocery stores, so I buy mine from Costco*.  You can get a fresh beautiful frenched rack of lamb for about $15.

    * Costco actually has a really good and fresh meat section, the problem, of course, is the massive portions they sell.  So I usually buy a package and then clean and cut up into manageable portions, place in zip-lock bags, push out the air, seal and toss into the freezer.

    Cook Time: 25 min                        Yield: 4 servings

    o      Rack of lamb chops (Frenched)
    o      2 Tablespoons of Fresh Rosemary leaves, chopped
    o      2 Tablespoons of Olive Oil
    o      Salt and Pepper

    1. Trim any excess fat off the rack of lamb. Rub with olive oil and season with salt, pepper, and rosemary on both sides.  Cover with plastic wrap and let the rack marinate in the fridge for anywhere between 30 minutes to 4 hours.
    2. Preheat oven to 350 degrees F.
    3. Take the lamb rack out of the fridge and let it come to room temp, about 10 minutes.  Remove the plastic wrap. 
    4. Coat the bottom of an oven-safe bottom heavy fry pan or skillet with olive oil and heat over medium-high heat.  Sear the lamb rack on both sides then move into the oven for about 10 minutes, depending on the size of your rack*.
    5. Using a meat thermometer, the rack should be about 140 to 150 degrees for medium rare, which I recommend because keep in mind that the meat will continue to cook for a few minutes when you take it out of the oven and let it rest for about 5 minutes.
    6. After letting the rack rest, cut between the rib bones to get individual chops.  Garnish with a little bit more of the chopped rosemary or chopped parsley.  Serve with any starch or veggies you like!  Shown here with mushroom squash risotto.

    * If you don’t want to use the oven, you can definitely cut the rack into individual chops prior to cooking and simply sear the individual chops on both sides in a pan over the stove.  This is quicker and more ideal for a dinner for two, when you only have to pan sear a few chops.  I like to roast racks in their entirety when I have to serve more than two people because I don’t want to be stuck at the stove searing chops all night.  Another advantage is that you get a variety of doneness for your guests.  You’ll notice that the center chops will be pinker in the middle and the side chops will be more medium.

    Friday, October 22, 2010

    Chicken Noodle Soup (Asian Style)

    Chicken Noodle Soup

    In almost all cultures, there’s a version of this dish.  Chicken noodle soup, just saying it evokes memories of childhood and warmth.  It’s the healer of all ailments and a dish that I believe everyone should be able to make from scratch. 

    Obviously the main ingredient to chicken noodle soup is chicken stock.  I’m not talking about the store bought can or box type, but the real stuff.  The golden goodness you get from just putting water, ginger, onion, celery, carrots, and chicken bones together in a pot and letting it simmer for a whole day.  Not only is it simple, chicken stock can be used in so many dishes to add richness of flavor.  Try using chicken stock instead of water when steaming rice or in chowder or gumbo, the possibilities are endless.  The best part is that stock can be frozen in batches so you will always have it on hand when needed. 

    Talking about stock brings me to another subject or tangent, if you will, that deserves its own separate posting.  Thus a posting will follow shortly about frugality and sustainability.  Wasting not and wanting not.  Making the most of what you have.  You get the idea.

    Prep Time: 10 min   Cook Time: 4-8 hours         Yields: 8-10 cups of stock

    o      1 medium size stockpot
    o      The bones of a chicken or two (You can usually find packages of chicken, beef, or pork bones only at ethnic markets such as 99 Ranch, specifically for the purpose of making stocks.  Otherwise, you can always buy a whole chicken from the market and remember to save the bones and undesirable parts for stock when you cut out the breasts for other use)
    o      A few carrots chopped roughly
    o      A medium onion chopped roughly
    o      A few stalks of celery chopped roughly
    o      About 5 good slices of ginger
    o      Salt and white pepper
    o      4 oz. fresh noodles
    o      1 stalk of finely chopped green onions


    1. Toss the chicken bones, vegetables, and ginger into the stockpot and fill 4/5 with water.  Add a couple teaspoons of salt and white pepper powder.  Place over high heat until boiling, then reduce to low heat and allow to simmer (with the lid on but with a partial opening) for anywhere between 2-4 hours.  The longer you let the stock simmer the more flavor will be concentrated and extracted out of the veggies and bones.
    2. When done, let the stock cool then strain of the bones and veggies.  Some people discard it all but I like to eat the carrots.  Unlike the onion and celery, which have pretty much disintegrated, the carrots usually hold up after all that simmering and become a soft tasty nourishing snack.
    3. Take a few cups of the golden stock and heat in a smaller saucepan. When brought to a boil over medium high heat, add a handful of fresh noodles and let cook for a few minutes.  Taste test the noodle to the desired donenss then pour into a bowl and sprinkle with the green onions. 
    4. Add salt and pepper as desired to taste. Then allow your body to be enriched and soothed. Enjoy.

    Chinese Vegetable, Shrimp, and Pork Dumplings


    Vegetable, Shrimp, and Pork Dumplings

    This is one of those classic Chinese dishes that you are likely to find in the freezer of most Chinese families.  These dumplings do take time to make and is a feat that should be taken on when you happen to have some time on your hands, but trust me, they are worth it!  Usually made in a pretty big batch then tossed in the freezer.  Its the perfect dinner solution for the busy parent on a weekday or the student who wants a quick homecooked meal.  Grab a portion out of the freezer, toss in boiling water or pan fry and voila! you've got yummy dumplings!


    Prep Time: 60 min             Cook Time: 10-15 min              Yields: 10-12 Servings (120 dumplings)
    • 2 lbs ground pork
    • 1 lb Shrimp (w/o shells and veined)
    • 1 bunch of Chinese chives
    • 2 stalks of green onions
    • ½ a head of Napa cabbage
    • 1 Egg
    • Soy sauce
    • Sesame oil
    • Salt
    • Ginger
    • White pepper powder
    • Rice cooking wine
    • Garlic cloves
    • Rice wine vinegar
    • Sriracha chili sauce
    • Round Dumpling wrappers (available at any Asian or specifically Chinese grocery store in the refrigerated aisle)


    Preparation:

    Dumpling filling - Ultra finely chop the shrimp, chives, green onions, and cabbage.  Use a cheese-cloth to strain/squeeze out all the moisture from the finely chopped cabbage.  Add all finely chopped veggies, grated ginger (2 teaspoons), and shrimp to ground pork in a large bowl.  Add soy sauce (approximately 3 tablespoons), sesame oil (approximately 1 tablespoon), a few splashes of rice cooking wine (approximately 1 tablespoon), one egg, a pinch of salt and a couple teaspoons of white pepper powder.  Mix well.
    * You can always substitute the different meats in the filling, you can even make a veggie version but using tofu instead of meat.  If you don't want shrimp, you can make it solely from ground pork, or ground chicken, or even ground duck.  Make it the way YOU like it.


    Dumplings – Have a small bowl or cup of water set aside.  Take a dumpling wrapper in the palm of your hand and fill with about 1 tablespoon or less of filling, the amount depends upon the size of the wrapper and just comes with experience.  Wet the inner edge of the dumpling wrapper, fold over, and pinch the edges together to form a creased pleat, sealing the dumpling.  Continue until the entire filling or all the wrappers are used.  This amount of filling should yield about 120 dumplings.


    View a video of "how to make dumplings"


    Dipping Sauce – Smash the garlic and remove the skin.  Add the garlic, fine ginger slivers, soy sauce, rice wine vinegar, and chili together in a small bowl.  There are no exact measurements, these ingredients are all to taste.  The main ingredient should be the soy sauce and the vinegar is generally just a teaspoon or so.

    Cooking:

    Boiled - Heat a large pot about 2/3 full of water to a boil.  Drop in the dumplings, depending on the size of your pot, about 20 dumplings at a time.  You don’t want the pot to get too crowded otherwise the dumplings will stick together.  Lightly stir the dumplings a couple times just to make sure they aren’t sticking to the bottom of the pot.  Let the water come back up to a boil then add 1 cup of water.  Let the water come back up to a boil again and add another cup of water.  When the water comes to a boil again, the dumplings should be floating to the top, this indicates that they are done.  Remove the dumplings from the pot into a serving dish with a strainer or large slotted spoon.  Enjoy by dipping into the sauce one at a time. 


    Pan-Fried (Pot Stickers) – Although it is not necessary, it is usually better to freeze the dumplings when pan frying them.  Coat the botton of a large non-stick frying pan with vegetable oil (about 1-2 tablespoons).  When the oil gets hot, turn the heat down to medium-high and add the dumplings one at a time with the ruffled/pleated edge facing up.  Cover with a large lid and let it fry for a few minutes to slightly brown the bottoms then turn the heat down to medium-low and add about ¼ cup of water and cover again.  Give the pan a little shake once in a while just to loosen the pot stickers from the bottom of the pan.  After cooking about 5-10 minutes it should be done, the bottoms of the dumplings should be golden brown.  Take one and cut it open to make sure it is cooked through.  Then remove onto a serving tray and enjoy by dipping into the sauce one at a time.


    Wednesday, October 20, 2010

    Mushroom Squash Risotto

    Risotto is one of my favorite comfort foods, and this particular risotto is inspired by Autumn.  The rich, creamy, warm texture and use of sweet squash and sage makes me glad, heck almost giddy that the leaves are turning and motivates me to bring out my sweaters and boots.

    Risotto can be a bit intimidating if you’ve never made it before, but it’s really quite simple.  Essentially its small grains of rice that you cook over the stovetop, the only difficult aspect is the attention it needs.  This is not a dish to be left unattended, you have to nurse it and stir in constantly, preferably with love. <3

    Cook Time: 45 min              Yields: 4-6 Servings

    o      1 ½ cups              Arborio Rice
    o      2 cups                  Any Winter Squash peeled & cubed into bite size pieces
    o      2 cups                  Mushrooms sliced, any variety will do
    o      ¼ cup                   finely minced Shallot
    o      2 teaspoons         fresh Thyme leaves
    o      2 teaspoons         fresh Sage leaves chiffonade
    o      6 cups                  Low-Sodium Chicken Stock/Broth (preferably homemade)
    o      2 tablespoons     Unsalted Butter
    o      2 tablespoons     Olive Oil
    o      ½ cup grated       Pecorino Cheese
    o      ½ cup                  dry white wine
    o      Salt and Freshly Ground Black Pepper


    1. In a medium saucepan, heat up the chicken broth over medium-high.  Meanwhile, peel, scrap out the seeds, and chop the squash into bite size pieces. When the broth comes to boil, reduce the heat to medium-low and add the squash.  Let the squash cook for about 5 minutes then remove with a slotted spoon or spider and put aside.  Turn the heat off and cover the saucepan to keep the broth warm.
    2. In another large saucepan, melt 1 ½ tablespoons of butter and 2 tablespoons of olive oil over medium heat and add the minced shallot.  Pinch of salt to help the shallots soften and sweat.  Add the mushroom, thyme, and sage to the pan and let the mushrooms cook until they brown, about 7 – 10 minutes, stirring occasionally.  (Initially moisture will come out of the mushrooms, let it cook off and evaporate, then the mushrooms will start to brown)
    3. Add the Abrorio rice to the mushroom mixture and mix so that the butter and olive oil coat the rice.  Pour in the wine and simmer for a couple minutes for the alcohol to cook off.  Add one ladle full of the broth and stir until the rice absorbs it.  Repeat until the rice is tender, with a slight bite in the middle.  Stir in the squash, remaining ½ tablespoon of butter, grated Pecorino cheese, and salt and pepper to taste.
    4. The overall consistency should be rich and creamy, but there is subjective personal preference.  If you want it to be looser, add a little more broth.  Serve immediately topped with a couple sprigs of thyme and sage.
    I served it here with a roasted rack of lamb…I feel comforted already.