So this is when we first met our future kitchen...
Love at first sight? Almost...

We didn't understand the temporary foldable picnic table either.

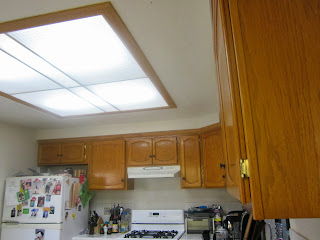
This is the 1980's tile I grew up with so that will definitely have to go.

Now in all honesty, after looking at hundreds of houses for the past two years, we learned to really look at the potential of a house. This room, the whole house, has some serious potential. The square footage of the kitchen alone is hard to find in an older house. Most of the homes we saw had galley kitchens and an open concept kitchen was almost non-existent. We were particular about the area we wanted to live, and newer construction track homes were not in our vision. I was feeling pretty good at this point, and pretty darn excited, we can work with this.

Then I looked up and I screamed, in my head. It might have come out in a gasp or screech, but the only other item I hated more than those 1980s tiles was fluorescent lighting. Shudder. Looking past these cosmetic flaws, we saw a great space and great bones that we could work with...now lets just pray we get a good inspection report.
Inspection passed, papers signed, we now owe a whole lot of money to a bank, and this is the moment we got our keys and walked into OUR kitchen. Speaking of walking into the kitchen, this doorway is going to be expanded. That was probably our first good decision. Simple right? You would think so, but in home remodeling, nothing is ever simple.
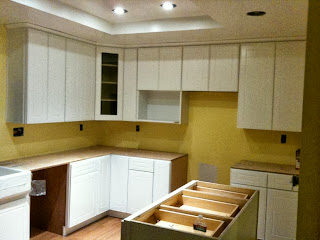
This is now what we have to work with and the wheels had been spinning in my head for the past three months, even more so the last month, on ideas of how to create our dream kitchen. Our first mistake was actually being too conservative and not thinking big enough. I was holding back and thinking, "we can keep the cabinets, we can keep the layout, we don't need to do a complete overhaul."
So then when we met with contractors for estimates, it was inaccurate and through the demolition and discovery process, we realized that what we really wanted along the way and had to make changes when work had already started. That ALWAYS ends up in delays and more money. What we should of done is dream BIG. What do we want? Then work backwards from our vision and see if there was anything that this current kitchen could satisfy.
One of our first mistakes was thinking we were keeping the layout. Since the doorway was being expanded and essentially the entire wall that contained the doorway was being removed to open up the kitchen to the dining room, we would be losing the counterspace next to the sink. This entire wall on the opposite side of the room wasn't being utilized and we later decided to move the cabinets and sink to this wall that you're looking at right now. Great idea, we just got the idea later, which then caused additional costs and delays because now we have rework electrical and plumbing.
Remember this space? The previous owners had used it to house a foldable plastic table with a massive amount of condiments. We weren't sure what to do with it at this point, but eventually it would dawn on us to put our fridge here and create a pantry.
I can't really describe the mix of excitement and grief that I felt when we tore up the first piece of drywall and demolition officially began. Here we just bought a house and now we're tearing it apart. It was jarring and not as fun as the HGTV makes it look.
Our reminder of what we were working toward.
Demolition done. Oh and the old cabinets weren't usable after all.
Did I mention we originally tried to do most of it ourselves? Yea, that notion didn't last long. Though, we did enlist help from many friends, friends' friends, and we did try to use our inexperience and unskilled hands at demolition, putting up insulation, dry wall, sanding, painting, and tiling. It was not fun.
This is what it looks like when homeowners try DIY.
This picture was taken close to midnight and after hours of work. Our poor friend, who was working with us, had been putting up dry wall most of the day. It was a little rough, and a little crooked, but we did not care at this point.
Our pantry.
Dennis is sanding til he can't sand no more.
There were moments of fun. =)
Almost ready for primer, thank GOD!
Paint and primer on, leveling the ground for the new floors, it's almost there!
Now it's just about putting all the pieces together.
Look what we found tucked high up in the top shelf of the master bedroom closet! Score!
The first items in our fridge, so fitting.
My Viking. Yes, its MY Viking! Viking just came out with the new D3 series and I couldn't wait to get this in our kitchen and try it out!
It's so pretty! I decided on a stainless steel backsplash instead of a pretty mosaic tile mainly because I cook quite a bit and I cook Asian food most of the time when I cook and the splatter and grease from all that action would be a cleaning nightmare on a pretty tile so we went with function instead of style on this one.
We put as big an island as we possibly could in the space and it worked out perfectly. Maplewood countertop for the island and it is THE most used surface in our kitchen.
The other item I just absolutely love in our kitchen is the farmhouse style sink. Kohler has a cast iron apron sink, and we went for it. It was a pain to install because it was so heavy. Our cabinet installer had to reinforce the cabinet underneath to support the sink, but its absolutely worth it. We can easily wash our pots, pans, and large cuts of meat in there without any problems.
Before
After
This now the new location of my "bursts" of cooking. The tears, the work, the sleepless nights, were all worth it because I can be comfortable and happy while I cook and that is priceless.


